We offer two ways to help you understand the solution to this query — pick whichever works best for you:
Prefer to watch?
Start with our short walkthrough video that shows you exactly how it works, step by step.
Prefer to read?
Scroll down for the full written guide with screenshots and detailed explanations.
Whitelisting a domain in the TIP Tool™ allows Admins to streamline user onboarding from trusted organizations (for instance a law firm the enterprise works with). Once a domain is whitelisted, users with email addresses from that domain can be added seamlessly through the Control Panel.
This feature reduces friction in collaboration while maintaining secure access control.
Why Whitelisting Matters
Without whitelisting:
- Users from unapproved domains require admin approval before being added.
- Managers cannot invite or assign users from unlisted domains.
- User onboarding is slowed down by manual approval requirements.
With whitelisting:
- Admins and Managers can freely add users from approved domains through the Control Panel.
- Invitations are triggered automatically when users from whitelisted domains are added.
- Onboarding is streamlined for recurring collaborators such as outside counsel, partner companies, or universities.
How to Whitelist a Domain (Step-by-Step)
Only Admins have permission to manage domain whitelists. Here’s how to do it:
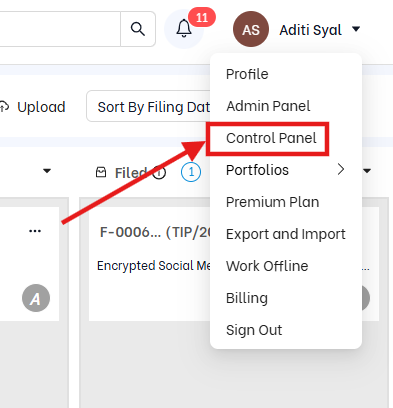
Step 1: From the top navigation bar, go to the profile icon and click on the Control Panel (visible only to Admins).
Step 2: In the left-hand menu, select the Whitelist section.

Step 3: Add a New Domain
- Enter the domain name (e.g., mgflaw.com, partneruniversity.edu)

- Once added:
- Any user with an email from that domain can be added without triggering domain-related restrictions.
- Invitations will be sent automatically when added from the Control Panel.
Managing Whitelisted Domains
- You can remove a domain from the whitelist at any time.
- Removing a domain does not remove access for users who were already added. It only blocks future automatic additions from that domain.