We offer two ways to help you understand the solution to this query — pick whichever works best for you:
Prefer to watch?
Start with our short walkthrough video that shows you exactly how it works, step by step.
Prefer to read?
Scroll down for the full written guide with screenshots and detailed explanations.
The Application Timeline in the TIP Tool™ offers a visual overview of key prosecution events across each patent application’s lifecycle. Whether you’re tracking filing dates, office actions, interviews, or allowances, the timeline helps you see the big picture — and zoom into the details that matter.
To accommodate different workflows and user needs, the TIP Tool™ allows you to customize the timeline view — showing either a simplified version or a full, event-rich progression. You can also customize your view by adding filters to view specific types of events. You can also, zoom in and out into the timeline based on the time duration you are considering and even access linked documents with a single click.
Let’s walk through how to access, customize, and use this feature effectively.
What Is the Application Timeline?
The Application Timeline is a chronological visualization of prosecution activity for a specific patent filing. It includes key milestones such as:
- Application Filed
- Office Actions (Non-Final & Final)
- Interviews with Examiners
- Amendments & Responses
- Notice of Allowance
- Patent Issuance or Abandonment
Each event is plotted as a node on the timeline and linked to the actual document where available.
Where to Find It
Step 1: Go to Portfolio Manager
From the main dashboard of the TIP Tool™, navigate to the Portfolio Manager.
Step 2: Select an Idea or Filing
Choose an idea or filed application that has moved into the USPTO review process.
Step 3: Open the Application Timeline
Scroll to the Application Timeline section and click to expand it.
Choosing the Timeline View
The TIP Tool™ offers three different timeline modes:
1. Default Timeline
Shows only key prosecution events for quick review:
- Filing
- Office Actions
- Interviews
- Notice of Allowance
- Final Decision (e.g., issuance or abandonment)
Best for high-level overviews and business reporting.
2. Full Timeline
Displays all prosecution events tracked by the USPTO or imported via the tool.
Ideal for patent professionals who want complete visibility into the history of a case.
“Sometimes you want to look at every little thing.”
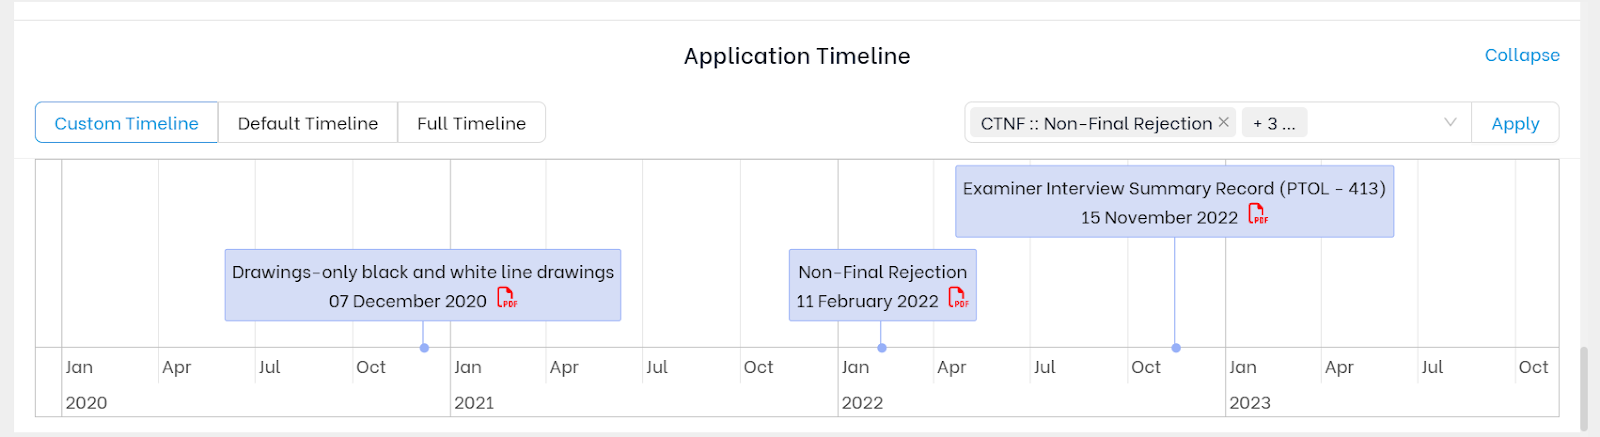
3. Custom Timeline
You choose which events to display using a filter panel. This mode is ideal when you’re focused on specific stages or event types (e.g., final rejections or appeal brief submissions).
How to Customize the Timeline
Step 1: Choose “Custom Timeline”
- Inside the timeline view, select the Custom option.
Step 2: Filter by Event Codes
- A panel will appear with checkboxes for various event codes.
- Select the events you wish to include in the timeline (e.g., only notices of allowance and interviews).
- The timeline will instantly update to reflect your selection.
Step 3: View Documents
- Click on any event node to view or download the related PDF document (e.g., Office Action, Amendment).
Zooming In and Out
TIP Tool™ provides an intuitive zoom function so you can focus on specific phases in the prosecution lifecycle.
- Use your mouse scroll wheel to zoom in or out
- If you’re using a trackpad, use pinch-to-zoom
Why Customization Matters
Not all users need the same level of detail.
- Legal teams may want the full picture, including amendments and appeal filings
- Executives and managers may prefer only high-level events like filing, office actions, and final decisions
- Paralegals and docketing teams may want to customize timelines for reporting and alerts
Customizing your view improves focus, saves time, and ensures you’re only seeing what’s relevant to your role.
Security & Accuracy
- All timeline data is pulled from public patent prosecution records
- Documents are stored securely within the TIP Tool™
- No data is lost — even when you customize your view
| Pro Tips -Use Default View for quick decision-making in team meetings -Switch to Full View when auditing a case for appeal, continuation, or IDS reviewUse Custom View to create role-specific snapshots (e.g., “show only final rejections and appeals”) -All views are available per user — switching views doesn’t affect other team members |